|
Project to Restore a Small Domestic Pump | |
|
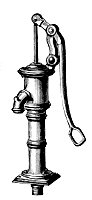
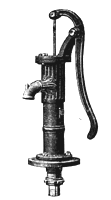
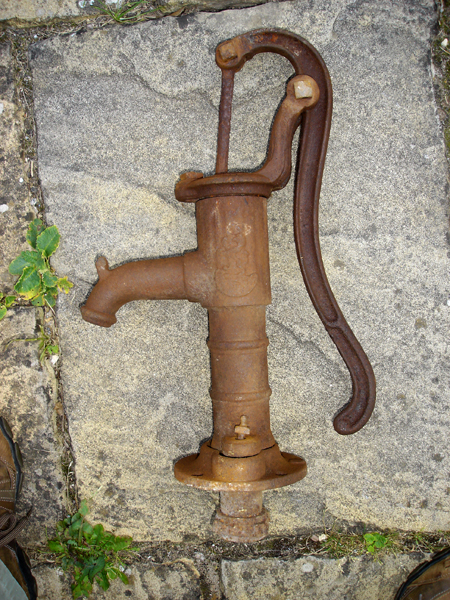
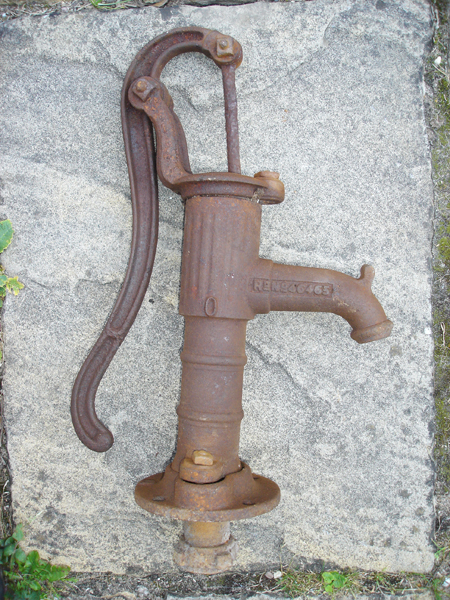
| In 2012 I came by a very small, rusty, cast iron pump with corroded bolts, no visible inlet valve, but from a quick inspection the internal surface of the barrel it didn't look too bad. It carried a Lion trademark, "RD NO. 46465" clearly discernible on the spout, and a "0" on the barrel. The old catalogues confirmed that it is a Joseph Evans Colonial Pump, Size 0. This is the smallest version they made, with a 2" bore, and in 1927 it sold for 17/-. But was it worth restoring - and with no specialist tools? | |
 |
 |
 |
 |
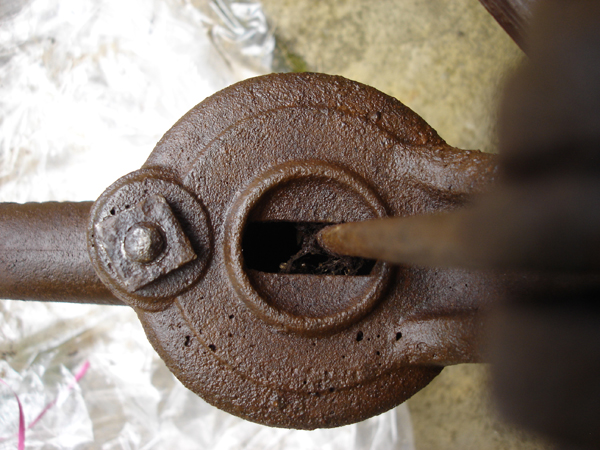
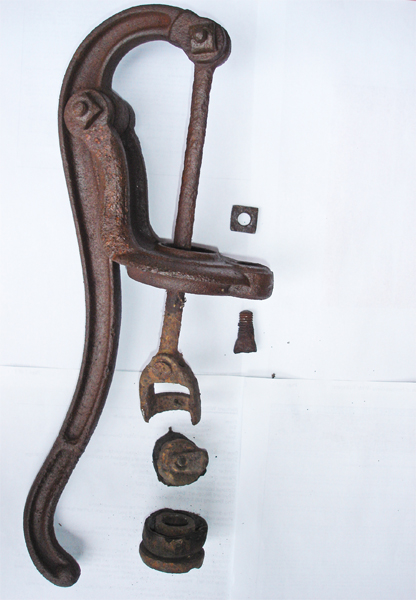
After a good wire-brushing and many applications of WD-40, the bolts still wouldn't shift, so I resorted to a careful tapping of the end of my spanner with a largish hammer. Some bolts responded immediately to this, whilst others needed an initial tap or two in the "wrong" direction - i.e., as if being tightened. Eventually all external nuts and bolts were separated in this way, with the exception of the two holding the bottom of the barrel to the flange and the large threaded collar on the tailpipe under the flange which originally would have connected to the downpipe. The flange bolts I easily cut off with a hacksaw, but the collar just wouldn't budge - so I turned to the hacksaw again to cut partially through the collar. A smart tap with a hammer on a cold chisel neatly broke the collar into two parts, leaving a relatively clean thread underneath which was easy to clear out with a small file and a wire brush. The operating rod was withdrawn, and I hoped to find an intact plunger on the end of it. The plunger was indeed there, at the end of the rusty operating rod, but part of the bucket had snapped off at some time in the distant past and was missing. Somebody had tried to attach the cup leather with a bent woodscrew. However, part of the clack valve remained, and also the characteristically-shaped weight which at some stage must have been on the inlet valve, complete with the remnants of the inlet valve leather fixed to it by means of a short brass bolt. What it was doing on top of the plunger I don't know, and can only think that it had been put there to keep it safe. These valve components were all put to one side for later attention. |
|
 |
|
| The barrel turned out to be in reasonable condition but clearly needed a good smoothing if it were not to ruin a new cup leather. I asked locally about the possibility of a very light skimming but couldn't find anybody who could do the job. Instead I bought a 2" emery flap wheel (80 grit) for just a few quid, and an extension piece to fit into my electric drill (another couple of quid). | |
 |
|
| With the drill on its slower speed I carefully smoothed out the bore - worried that it would take off too much, but as it turned out it took quite a lot of work even to make a slight impression. The major components then went for sand-blasting (actually, it turned out that the firm employed glass beads rather than sand) and a zinc phosphate primer coat. | |
 |
|
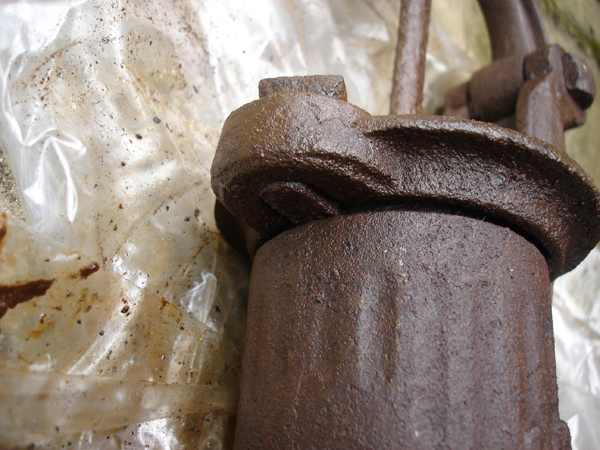
The tailpipe thread turned out to be 1¼" BSP and our local Plumb Center was able to provide a plastic threaded coupling and some piping to fit. A drop of liquid detergent on the thread helped me get a good tight fit. |
|
 |
|
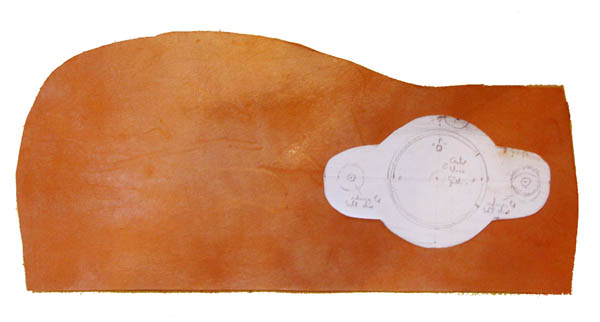
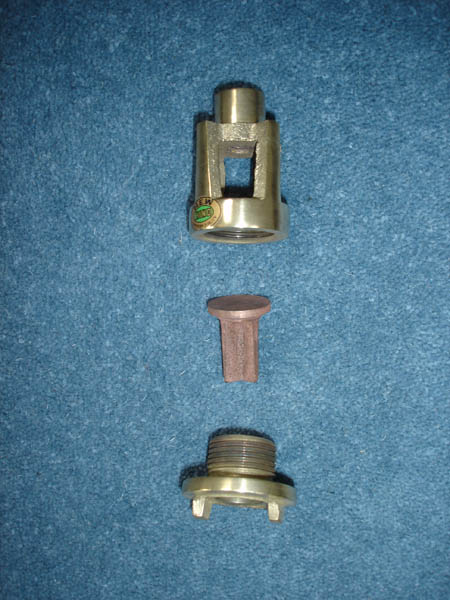
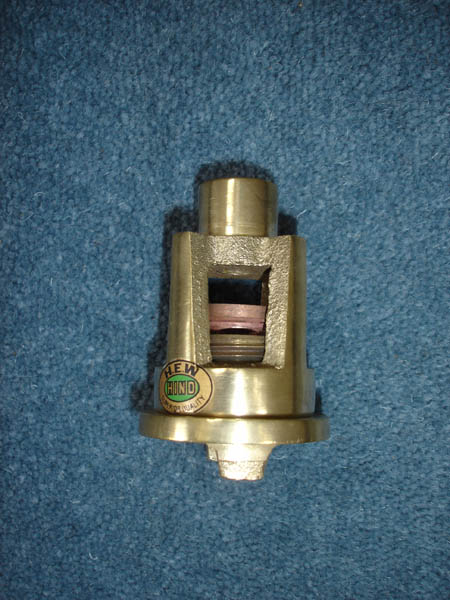
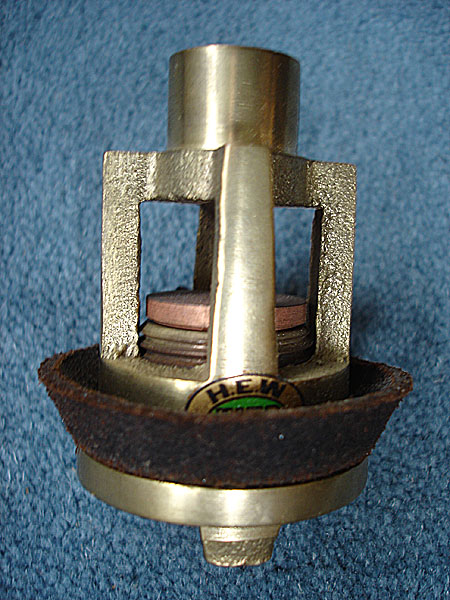
A 2" bucket & clack valve is a rare beast and the only company I could find advertising one is located in India. They quickly responded to my enquiry saying they could supply one for the princely sum of $2, plus delivery charge. On checking what this charge might be they confirmed that I could have it delivered for a total cost of $14-50. However, they required payment via electronic bank transfer and my bank charged me another £20 for the privilege. Still, it's far cheaper than having a replacement part made in the UK. After a wait of many weeks and a number of false starts the part eventually arrived, beautifully packed and of very high quality. Well worth the wait, but supplied without a cup leather - which was promptly supplied by Base Camp, in Littlehampton. In the meantime, I turned my attention to the inlet valve, and decided to make a combined leather valve and seal to sit in the seating which the flange provides. I produced a paper template with the positions of the fixing bolts, the bore of the barrel and the bore of the downpipe carefully drawn in. The C-shaped flap needed to be cut wide enough to overlap the bore of the downpipe, but narrow enough to lift up within the barrel, without snagging the inner surface. A quick visit to a local traditional cobbler's resulted in an offcut of shoe leather, about 2mm thick and fairly pliable. The next step was to cut it to shape and fix the weight to it. |
|
 |
|
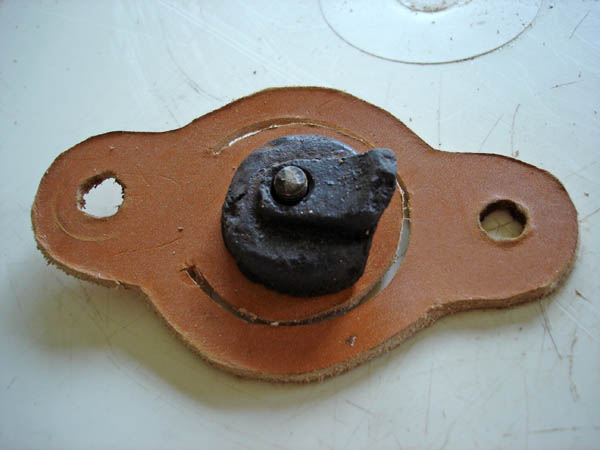
| Without a set of leather punches it
was never going to be a terribly neat job, but a Stanley knife with a brand new
blade was adequate. I cut around the template, offered it up to the bottom of
the barrel, and trimmed it very slightly to produce a good fit. I cut out the
two holes for the bolts which would clamp the pump barrel to the flange, marked
the centre point and then, from the template, cut out the C-shape. The weight
was fixed on using the original brass bolt, and with the nib at the open
end. Somewhere I've read whether the shiny side of the leather should face up or down, but can't remember which, nor where I read it. Back to my reference books. |
|
 |
|
Here's the bucket & clack valve, with the cup leather fitted: |
||
 |
 |
 |
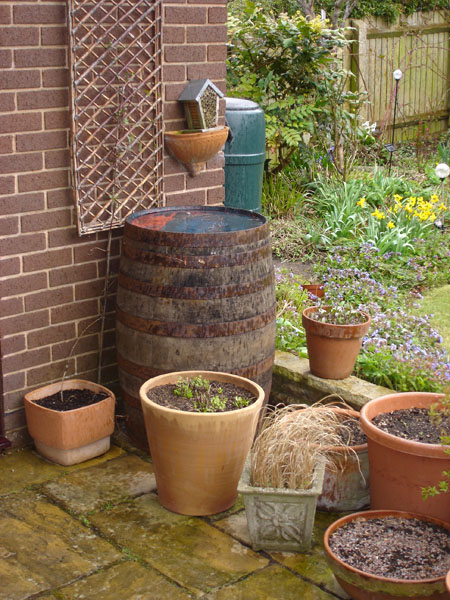
It took a long time to find the right barrel at the right price but eventually our garden centre halved the price of its large recycled Kentucky bourbon barrels and, with only a slightly crushed finger, I got it home in the back of the car and set it up by the garage. But will it be watertight? |
||
 |
||
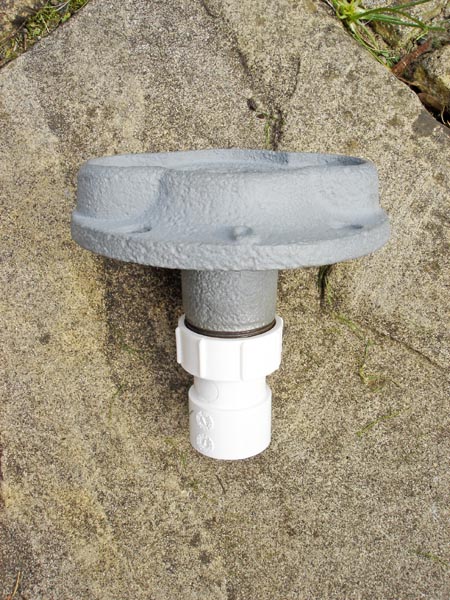
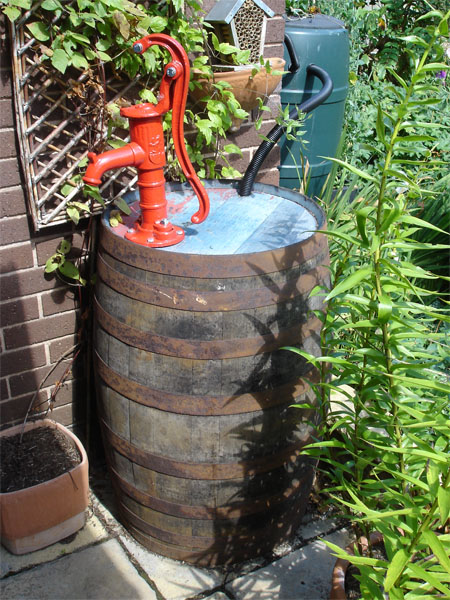
The pump has received multiple coats of scarlet Hammerite and is now fitted to the barrel, with the inlet valve sandwiched in place. The plastic downpipe, inside the barrel, was cut to a length which left it clear of the bottom of the barrel by about an inch or so. Flexible inlet and overflow pipes have been introduced, and after a good thunderstorm the barrel is full of water - and it's watertight. Just one problem remaining, and that's the connecting of the new clack valve to the old, oval cross-section, operating rod. |
||
 |
||
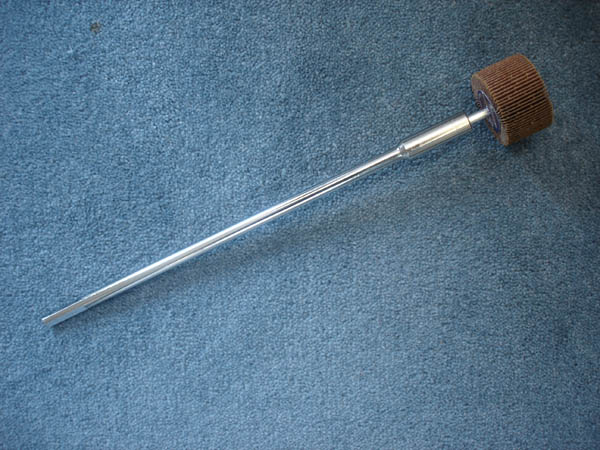
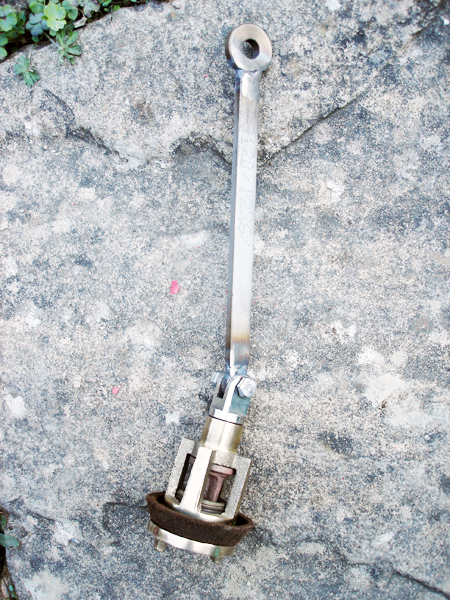
Time passed...and at last I had to admit that I couldn't fabricate a new operating rod with my limited tools/expertise. To cut a long story short, a friend of a friend who builds model traction engines and just happens to have an engineering workshop at the bottom of his garden made a rod for me, complete with a clevis to allow for the pivoting movement: |
||
 |
||
In doing this we found that the Hammerite, which I'd so painstakingly applied in multiple coats, chips off very easily and the pump now looks tatty. So now I've got to strip the paint off and start again with acrylic. To be continued.... |
||